Before going to
Artfest I
couldn't figure out what to bring for trades. I tried this and that and
at some point I thought envelopes would be fun and it's something you
always need. So I played around and started having a lot of fun making
them.
Not long ago, Jessica Brogan, whom I met first through http://hellosoulhellobusiness.com/ (or HSHB) and then at Artfest asked me if I could make a tutorial for my painted envelopes. I liked the idea, so here it is...
Not long ago, Jessica Brogan, whom I met first through http://hellosoulhellobusiness.com/ (or HSHB) and then at Artfest asked me if I could make a tutorial for my painted envelopes. I liked the idea, so here it is...

You
will
need :
- Paper, whatever color you want, thicker than printer paper, but not cardstock (it is a bit too thick to fold. It works but makes a pretty heavy envelope. )
- Doily, punchinella and/or any stencil you like
- Color wash spray (I use Adirondack, but also Radiant Rain by Creative imaginations. The colors are very bright even when dry and the sprayer doesn’t get clogged – unlike the Adirondack ones. But really, any kind will do, it doesn’t have to be watersoluble or not, it will just have a different effect in the end).
- White liquid gesso (preferably one that doesn’t cover too much)
- Background stamp
- Stamp pad (an ink that dries quickly like Stazon or Colorbox Liquid Chalk. Whatever you have)
- Acrylic ink (liquitex or FW have great colors)
- Scoring board with envelope tool (or an envelope template, there are tons on the web)
- Bone folder
- Glue tape (or double-sided tape or any king of good glue that you like)
I recommend doing several envelopes at once
Cut a piece of paper in a 7 ½” square
(it makes
a 5 ¼” by 4” envelope)
Use a doily (or any stencil you like)
to make a
pattern with color wash spray (you can see my cotton doily has seen many
colors...)


Let it dry a little and paint white
gesso
(preferably one that is more transparent) in a random way over the
pattern. Let
dry.
Put a couple of drops of acrylic ink
and rub them
on the paper with your fingers.

Make some marks with inkpads and
punchinella

Use a background stamp and cover the
whole paper
(script in my case) with a light color (like bronze)

Here are a few papers. You can
see I added a few letters with a
lettering stencil.

I decided to add some circles with a
bottlecap
and distress ink (any ink will do)

Feel free to skip or repeat any of those steps. You
can
see a little bit in the first picture I
didn’t always follow the same guidelines. Sometimes I painted gesso on
through
a stencil or through the punchinella. Sometimes I added paint here and
there. I
also used the sprays with a letter stencil instead of the doilie.
Feel free to make any king of marks you want. There’s all
sorts of options.
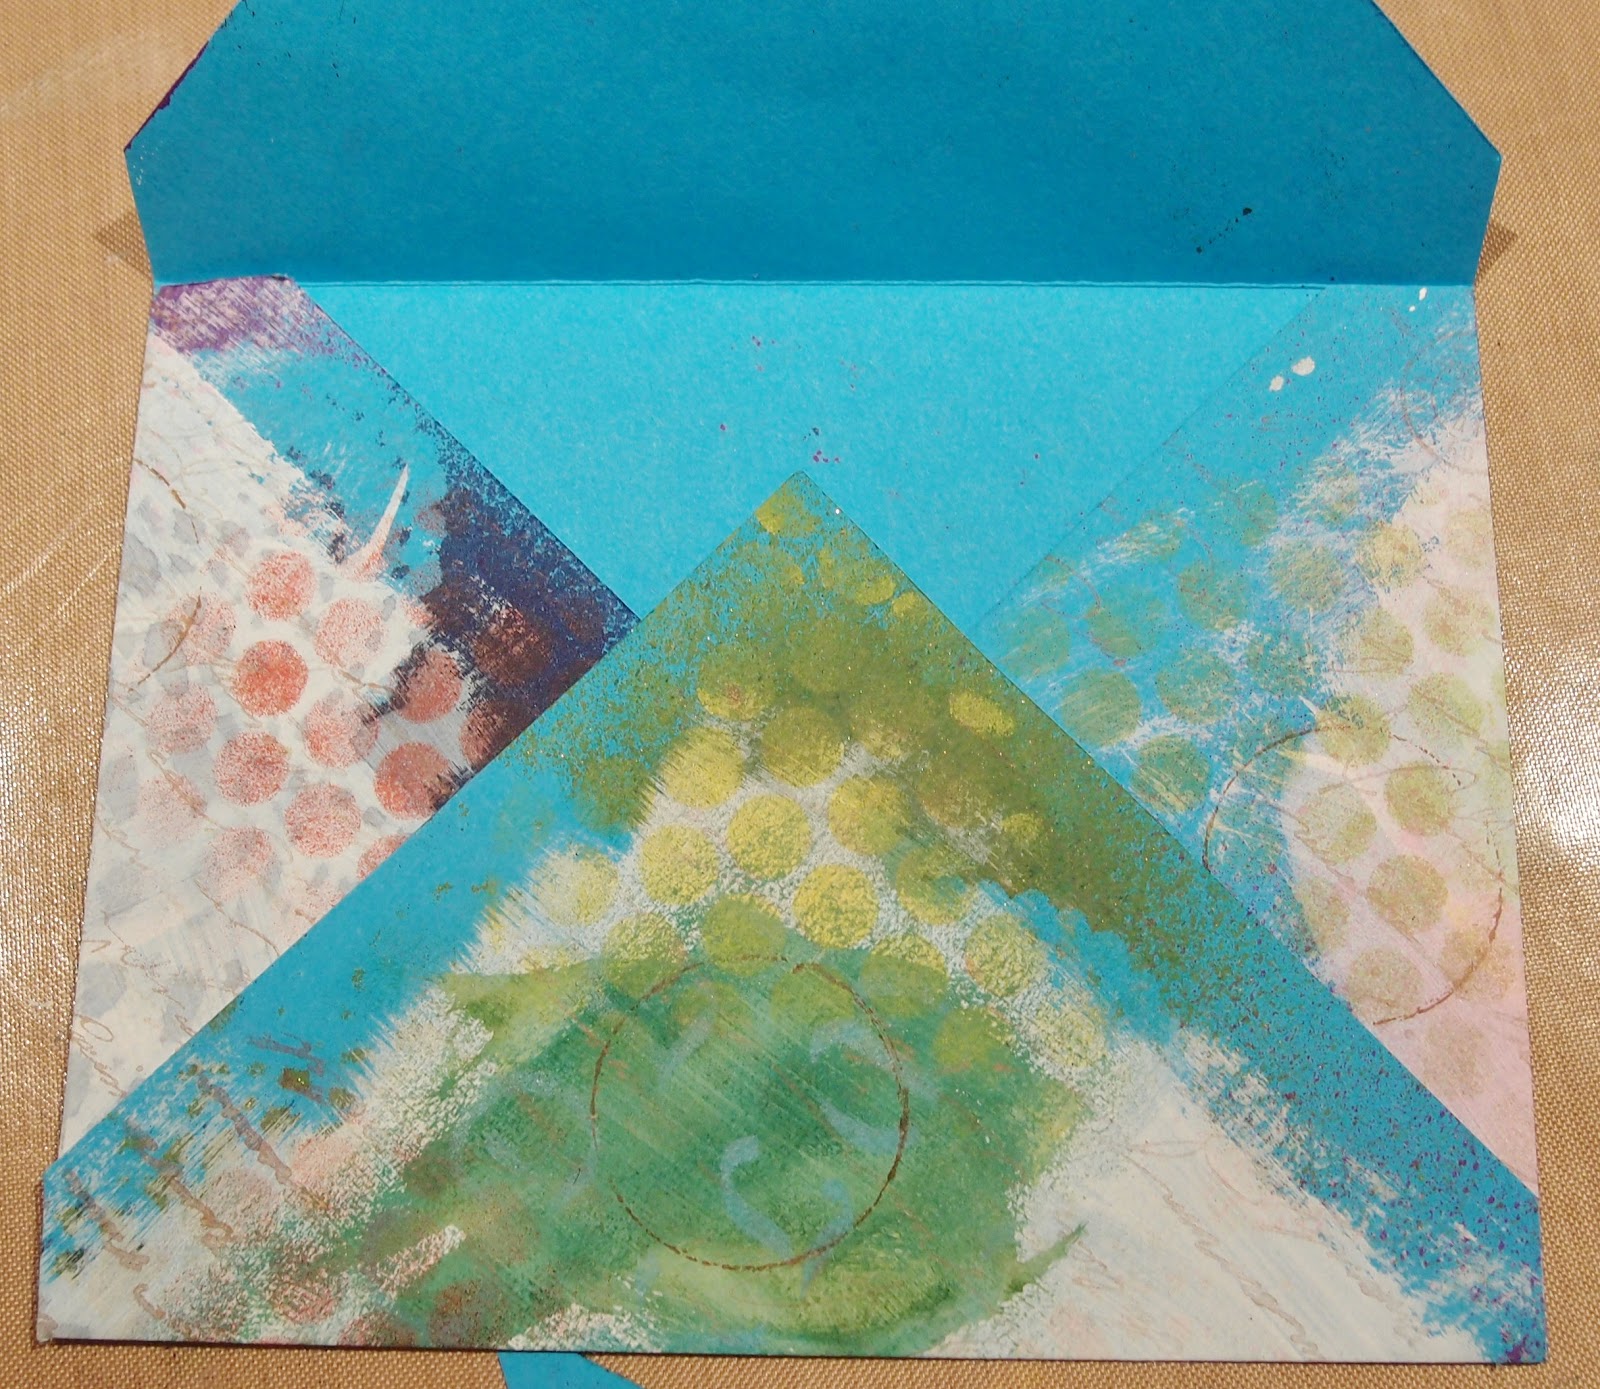
Once you like the way it looks you are ready to
fold.
Place your painted square painted face down on the
scoring
board. Using the triangle (envelope tool) score at 3 ¼”, turn, score at 2
5/8”,
turn, score at 3 ¼”, turn and score at 2 5/8”.

You will get 4 little
triangles not quite in the middle of
each side. Cut them out on the scoring lines (actually it’s better if
you don’t
see the scoring line once you are done cutting).

Time to fold !
Use a bone folder and fold all sides toward
the center of the unpainted side. Make sure all sides fold nicely, cut
out a
little more if necessary.

Decide which of
the bigger flaps you want to see on top.
Fold the 2 small flaps and use glue tape to adhere the bigger flap.

If you want, use a punch to decorate the edges of the 4th flap.

That’s it, you’re done !

Have fun